

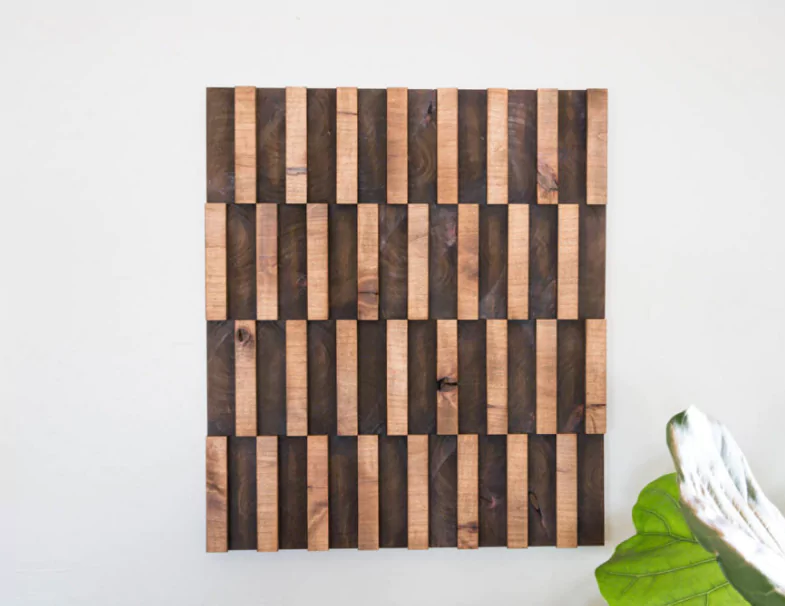
Welcome people to DIY Beauty! We are here with an exciting project known as DIY Abstract wood wall art. It will be quite satisfying for all DIY lovers. In this project, you are going to learn how to create amazing wall art by using wooden pieces. This wooden wall art will beautify your living room for sure. In this post, we are going to share with you the steps to turn simple wood scraps into a masterpiece.
Step-by-Step Guide For DIY Abstract Wooden Wall Art
There are many ways through which you can easily craft DIY abstract wood wall art at home. If you are a DIY novice then you should go for this project. In case, you are a DIY pro then this DIY project will be a piece of cake for you.
Materials Required
There are some materials which are a must for you to grab to create this DIY abstract wood wall art. Check out these materials and grab them up:
- Stain
- Miter Saw
- Clamps
- Scrap Wood
- Foam Brush and Cloth
- Glue
- Table Saw (Optional)
- Wall Mounting Hardware
Step 1
First of all, you have to prepare the wood. We need to cut down the wooden board 2×6 into 1-inch-wide pieces with the help of a miter saw. You have to make use of these wooden pieces to form the base of your DIY abstract wood wall art.
On the other hand, you have to keep in mind the quantity of the wooden pieces. You have to cut each piece in length 21.5 inches and width 18 inches. Moreover, you will need around 64 wooden pieces to create this project.
Step 2
When your all-wooden pieces are ready then it is time to glue them up. However, you have to glue the pieces in a random order and mix up the flat grains. In this way, you are giving your project a beautiful look.
Furthermore, you have to use 16 wooden pieces in a single row. After that, you have to clamp them all efficiently and let these pieces dry.

Step 3
It is time to perform the same gluing method for the rest of the rows of your DIY abstract wood wall art. You will get around 4 rows. However, make sure to let the glue dry completely for best results.
Moreover, you have to trim the edges of each wooden piece to make sure they are smooth. You can trim them by using a sander or a table saw, the choice is yours.

Step 4
When all the rows are dried completely then you have to glue the edges of each row. Once the glue dries up then you have to start clamping these rows altogether. In this way, you will get your basic design of DIY abstract wood wall art.
Furthermore, you have to apply the wood stain of your choice by using a foam brush. Make use of a cloth to wipe out any excess of wood stain. After that, you have let the wood stain dry up completely. Leave it for a night and start working on it the next day.
Step 5
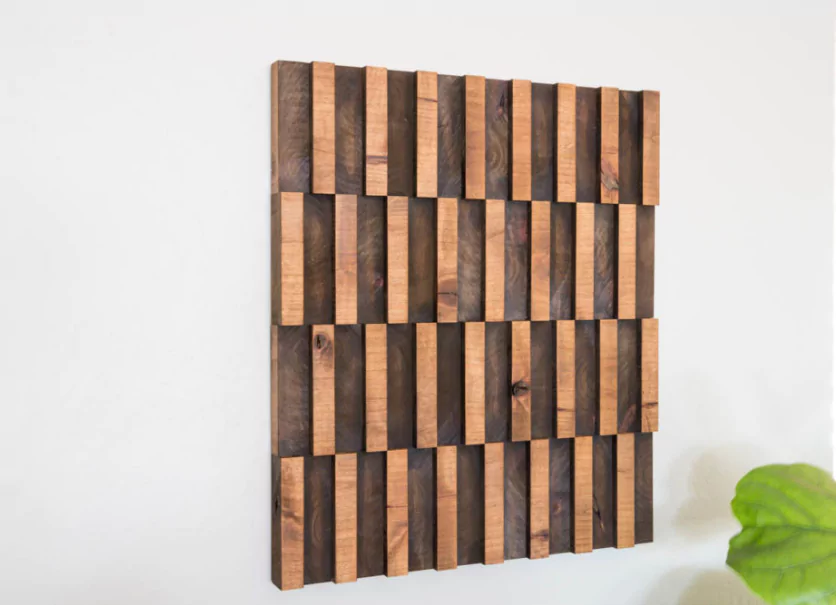
The end result would be out-of-the-ordinary, and you can dangle it on any wall of your home. Also, you can put it on your office room wall for beauty. However, you have to make use of proper wall mounting hardware to display your masterpiece safely.
Safety Precautions To Keep In Mind
Before starting this abstract wooden wall art, you must keep in mind the safety precautions. Working with wood is not an easy task so you have to be quite careful. If you mishandle it then it can lead to serious injuries or accidents.
Wear Safety Glasses And Hearing Aid
When you are going to work with wood then you have to wear safety glasses. They are readily available on any goggle store. These glasses will protect your eyes from dust and dirt.
Moreover, you have to wear a safety hearing aid to protect your ears from noise. Power tools can generate too much noise which can affect your ears.
Take Time To Learn The Tools
You have to take time to learn about the tools you are going to use for this DIY abstract wood wall art project. Read the user manual of every machine or tool you are going to use. Moreover, it is important to understand their functions and use them accordingly.
Ensure Proper Ventilation
Ensure that you have proper ventilation at your workspace. Ventilation is imperative when you are going to use any adhesives, finishes or even the wood stains. These things release fumes which can be harmful for your lungs. Thus, you need to work in a space where there is a good ventilation system so that they can evacuate properly.
Use Proper Cutting Tools And Method
Whether you are a DIY novice or a pro, you have to use proper cutting tools and methods. If you are going to use a table saw, then you should learn it first. Try it on big wooden pieces. When you become capable of cutting down the big ones then it would be easy for you to cut down the little ones.
Furthermore, you have to use the proper method to cut down the wooden pieces. Grab the wooden piece firmly that you are going to cut. If necessary, you can make use of push sticks. However, keep a safe distance from the blade of the cutting tool.
Conclusion
In conclusion, this DIY abstract wood wall art will be suitable for all of your spaces. You can use your creativity to beautify this project more. Moreover, the tutorial is quite simple so any adult can follow it. You have to roll up your sleeves and start making this wall art for your room. It will not cost you much as wood is available at an affordable price. Therefore, try this cost-efficient DIY wall art project right now!
You May Also Like:
← Art Paint On Wood – Everything You Need To Know
→ DIY 21st Birthday Gift Ideas