

Welcome everybody to your favorite website DIY Beauty! Are you fond of felt ball garland? If so then you will be happy to know that you can now, make it at home. Don’t know how to? Well, not to worry! As DIY Beauty is here with the simplest method to make felt ball garland.

Materials Needed To Make Felt Ball Garland
Making felt ball garland is quite easy whether you are a DIY expert or a beginner. You do not need a lot of things or time to try this DIY felt ball project. At the moment, we are first going to discuss the required materials.

Tapestry Needle
Tapestry needle plays an imperative role in making felt ball garland. It usually comes with a medium and large head so you can easily choose the one that suits your needs.
Mostly, people who prefer cord choose large head tapestry needle while the ones who prefer string choose medium head. However, we would recommend you use the large head tapestry needle as it is quite easy to use.

Strings/Cords
You can either choose strings or cords, it is entirely up to you! There are no hard rules that you must use strings or cords to make DIY felt ball project.
However, we would suggest that you should go with cord as it is a bit strong and durable as compared to the strings. Still, some people like to use nylon string which is also a good option.
It is imperative to cut the string or cord properly so that you can easily make a loop on each end. For instance, you need 3 meters of the string/cord then you must leave 30 cm of extra length on each end. In this manner, you will be able to make a loop efficiently for your garland. Not just that, you will not face any kind of issue while hanging it on your wall.

Scissors
If you are using string for the DIY felt ball project, then you can use regular scissors. However, you need to have a big scissor to cut down the cord properly.

Felt Balls
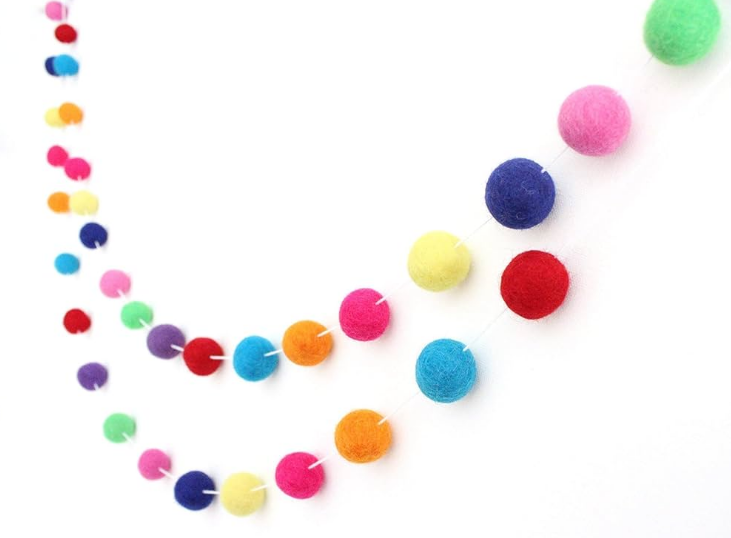
It is obvious that we need felt balls to make DIY felt ball project! However, you need to have different kinds of felt balls for this DIY project. Some people are fond of using polka dot felt balls while others like felt glitter balls. It does not matter which kind of felt balls you like; you can easily make the garland.
Nevertheless, if you want to make a perfect felt ball garland then you should get at least balls of 2 cm. To add some variety in your garland, you can use a combo of different sized balls like around 3-4 cm. Moreover, you can add some animals, stars or other things to beautify it more.
Furthermore, remember to use balls in different colors. A good color combination will make it look more eye-catching and appealing.
Complete Instructions
The method to create this amazing DIY felt ball project is so easy that any of you can do it! There is no need to have a lot of experience in the field of DIY. You just need to follow each step properly to complete your own felt ball project.
Pick The Best Shades
When you are going to craft this felt ball project then you need to pick the best shades. If you are not sure about the color combination, then no issue! You just have to put them in different shade order. After that, it would be easy for you to choose the best color combination. However, you have to write down the shade order so that you do not forget it later.
Moreover, you need to remember that for each meter of felt ball garland, you will require around 10-15 felt balls. So, you have to keep in mind the length of the garland, quantity and shades of the felt balls.
Start Creating
When you get the right length of your garland and a good number of felt balls then it is time to start creating this project. No matter if you are using cord or string, the method remains the same. As mentioned before, you have to leave extra length on each end. After that, you have to start making a little knot with your finger on each end as making a first loop is imperative.
However, it is the time to use a tapestry needle to put each felt ball into the string or cord. Be careful while threading these felt balls in the perfect color order. Remember, you need to start threading these balls from the middle. When all the felt balls are stuck to the thread then you have to make a small knot loop. This knot will surely make the felt ball garland strong and durable.
Leave Space Between The Balls
Whenever you are threading balls in the garland, it is important for you to leave enough space between each ball. Nevertheless, you can leave as much space as you like but we would recommend leaving 2 fingers gap.
Final Touch
When your project is ready then you can add a final touch to it according to your choice. You can add a bit of glitter on the balls or cord/string to make it look appealing. Moreover, you can add decorating accents, ribbons, and bows between the balls to enhance its beauty.

Conclusion
In conclusion, making felt ball garland is nothing but a piece of cake for people of all ages. This DIY felt ball project does not demand a whole day. You can finish it in just a couple of hours, like around 3-4 hours maximum. Not just that, you can personalize it according to your choice for any event or space. For instance, you can customize it according to Christmas, wedding or any other event. Or else, you can make and dangle it on your entrance to welcome every guest. So, there are many things to do with this single DIY felt ball project. Try it today and let us know how it went!
You May Also Like:
← Chicken Cobbler Recipe
→ DIY 21st Birthday Gift Ideas